
 DIY is not my strong point, so when it came to begin the construction of our outdoor clay oven last Saturday, things pretty much went like this:
- Draw a rough sketch of the oven base and estimate how many bricks we’ll need.
- Bring sketch to small local hardware store.
- Realise small local hardware store has a very poor selection.
- Go to big giant Home Depot style hardware store.
- Go to the outdoor construction department and make a “duh” face. Realize we have no idea how much wood or how many bricks we’ll need.
- Go back home, draw a more detailed sketch of the table and measure the number and size of all the wood cuts we’ll need.
- Go back to big giant store, load up on treated timber.
- Find out big giant store won’t cut treated timber. Add a skill saw to the basket.
- Pile 45 bricks into our cart before realizing we based our brick floor measurements on the length and depth of the bricks rather than the length and width.
- Add an extra 20 bricks to the cart.
- Give the store our money, go home, hoping the Astra’s suspension will survive all of the bricks, sand and timber.
- Arrive home with our haul and start building.
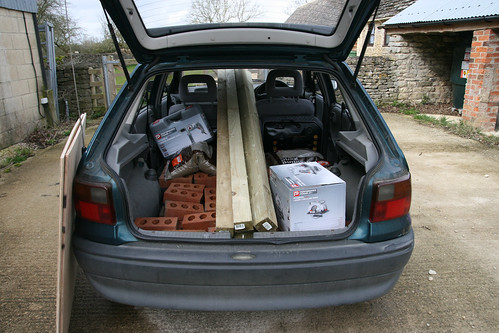
In the end, we returned with the following materials for our base and oven floor:
- 2 – 2400x75x75mm fence posts (legs) – 17.56
- 4 – 2400x75x47mm planks (supports) – 17.92
- 2 – 2400x100x19mm planks (edging) – 6.56
- 1 – 12mm plywood sheet (table top) – 25.48
- deck screws – 6.48
- 75 common bricks (oven floor) – 27.75
- 2 – 50kg bags of builders sand – 2.98
So far, we’ve spent £104.73 on materials for the oven, plus another £124.96 on extra tools needed for the job (drill, circular saw, level, drill bits and a brick bolster).
Luckily we got most of mistakes out of the way during the planning phase of the project, and when it came time to build the oven, things went really well.
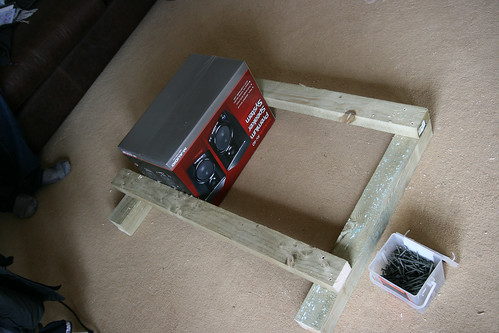
Cutting the timber
The hardware store cut the plywood, but we needed to cut the timber.

We cut the wood into
- 4 – 75 x 75 x 700mm legs
- 8 – 75 x 47 x 933cm bracing pieces
- 4 – 100 x 19 x 1000mm trim pieces
We then pre-drilled holes into the bracing pieces, using Tim’s handy index card template as a guide.
Assembling the legs
After attaching our first bracing piece to the legs with deck screws, I was delighted (and a little surprised) that the legs were level:
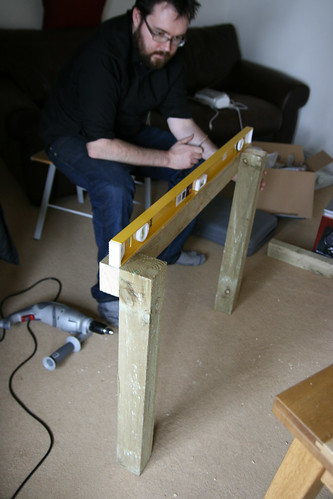
Behold our clever set square:
With the legs and bracing pieces assembled, it really felt like our oven base was coming together:

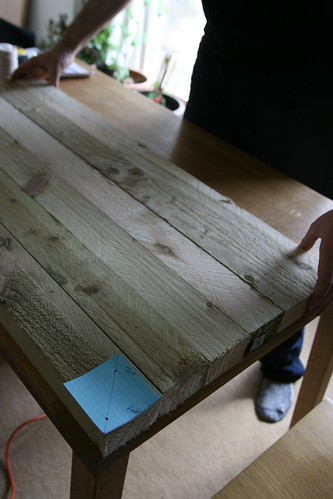
Attaching the table top
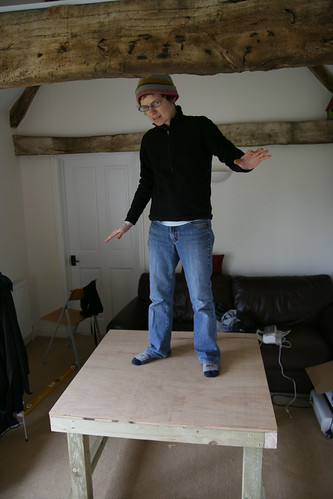
Now for the table top. We attached two sheets of 12mm thick plywood with nails and deck screws:
It’s stable – but will it hold 50+ bricks? Time will tell.
Tinfoil insulation
It was now time to move the table outside into position. We attached two layers of tinfoil to the outside to protect the plywood from water and to provide some reflective heat insulation to our oven. And then it started to rain!

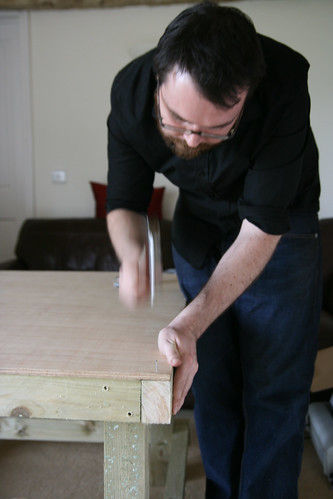
Attaching the trim
It took all day Saturday to build the above. Sunday morning, when the rain stopped, we put in the oven floor, starting with some wood trim around the table top:
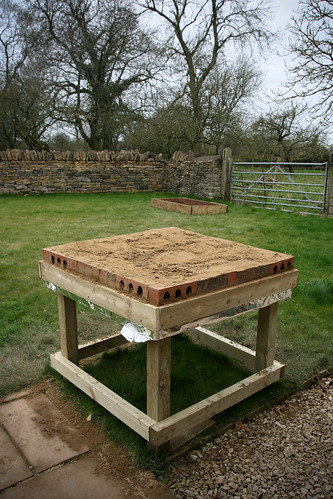
Adding the sand base
A layer of sand provides further insulation between the table top and the brick layer:

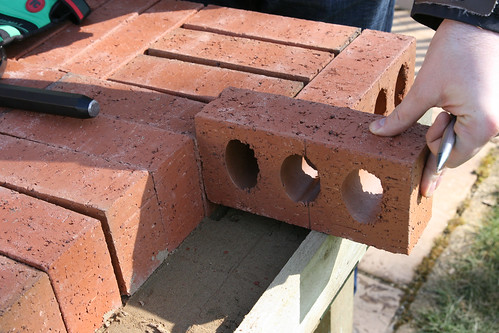
Laying the bricks for our oven floor
Now for the fun part: laying bricks, packed as ti
ghtly as possible. Not as easy as it seems. Due to our earlier measurement failures, it took some cunning to figure out a pattern of bricks that would minimise the need for brick cutting. In the end, we only needed 8 half bricks, which we cut using a hammer and bolster:

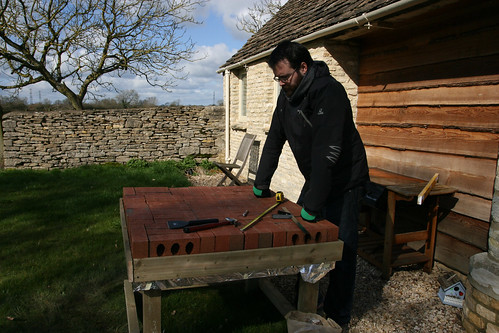
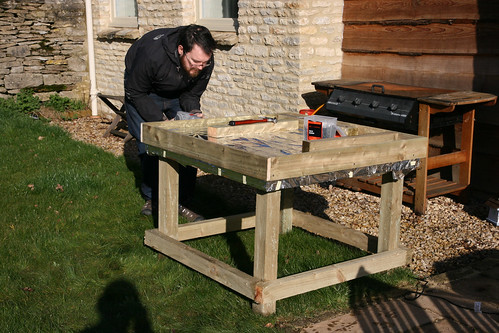
Finally, we piled sand on top of the bricks and filled in the gaps as much as we could.

Base and oven floor complete!
All in all, it took us 1.5 days and about £106 to build the base. Despite earlier setbacks, I’m really pleased with our work so far. We managed to build a very sturdy base that should support our clay oven with no problem AND have the added bonus of providing wood storage underneath.
Its a relief to have this step behind us so we can move on to the fun part: building the oven itself. Our next challenge is to find some clay.
To see more photos of the process, visit my Clay Oven photoset on Flickr.

This was really well done for a first attempt! I can hardly wait to see how things progress and what you make in it.
As a small business owner, I’m glad you tried the local small store for supplies first. Too bad you didn’t have success there, but at least you tried!
Good luck with the clay!
Monica and Tim…. I am beyond impressed! GREAT work. And the best part is you cut yourself a learning curve, and were not defeated by a set back or two. As they say, things always take longer and cost more than you think they will. The results look fabulous. I honestly believe some sort of guidebook or tutorial can be created from this to help future clay oven makers. Good luck with the next step!