I’ve been a little quiet these last four weeks, due to recent holiday travels to the States which typically saw a serious decline in all productivity (the evidence is in the nearly 1000 photos I took while there). On the plus side, it saw a huge upswing in QFT (Quality Family Time) and gave me the chance to binge on baking as I knew I’d have plenty of willing recipients to devour my creations!
One of my staple bakes is the infamous no knead bread. I have been making this loaf for years and it is the bread I bake most (see Easiest No Knead Bread with Variations). There are two reasons for this: (1) it’s the easiest bread recipe in the world and (2) it is the bread that always gets the most positive reviews (which makes me wonder why I slave over sourdough, but that’s a topic for another time and place).
The no knead bread recipe is based on this recipe from the New York Times. And it really is a loaf that ANYONE can make – mix the dough, let it rest for ages, shape it, then bake it. The only tricky part is that it requires a dutch oven or cast iron pot, and involves transferring the risen dough into the hot pot after it’s pre-heated in the oven. This step is easy to overcome, but still, as much as I’ve tried to convince the people who love this loaf that YES THEY CAN bake it themselves, few give it a go. I guess buying a loaf is still just that much easier – and far less scary. Until now!
While I was in Chicago, having fun and neglecting this blog, I was also often neglecting my dough! I’d mix the dough with the best intentions but then something would come up and take me out of the kitchen for hours or days. The original no knead bread recipe says to let the dough rise 12-18 hours, but there were times when I’d let the dough rise for 36-48 hours. Gasp!
There were other times when I didn’t have a lidded pot to cook it in. Surely I was cruisin’ for disaster.
And yet, every loaf turned out just fine. In fact, better than fine. The bread – and in turn, the toast – became legendary!
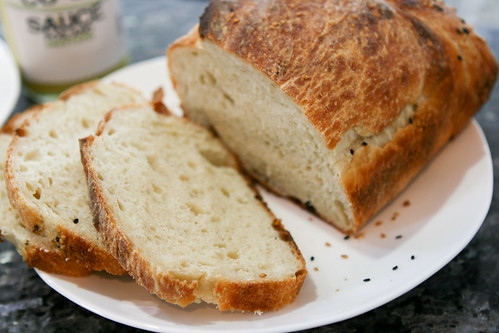
This was the trip where I learned just how forgiving the no knead recipe is. Not only can you let the dough sit for days, but you can also bake the loaf in a normal bread pan without a lid and still get stellar results (see the recipe below).
I did this a LOT while my relatives from Ohio were in town. Toast was high on the breakfast agenda, and my family quickly soon started referring to me as the “toast fairy” because their kids would wake up and there the bread would be, magically waiting for them with butter and jam (what can I say, I’ve had a lot of practise with Airbnb). This was almost as magical as the view outside (prime toast-eating weather):
Throughout their stay, the “toast fairy” theme took on a life of its own – we schemed ideas for cafes and childrens books and animated movies. After all, who in the world isn’t comforted by a slice of toast? Consequentially, this is not a new discovery – San Francisco is already hip to the artisan toast trend (as written in this highly moving article in the Pacific Standard about where it began); it’s only a matter of time before the toast trend hits London. Which makes me wonder, being the “toast fairy”, if I’ve stumbled upon my true calling?
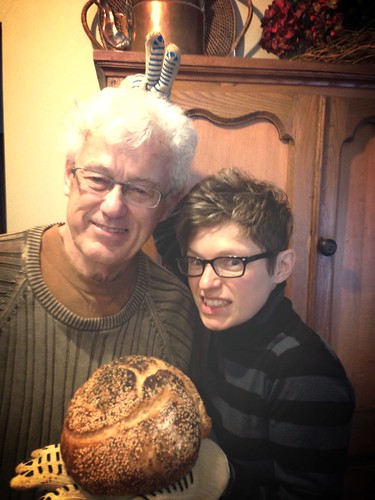
(I big pile of thanks to Jim and Melissa for the apron! If only toast travelled well, I’d send you a thank you slice from here to Ohio!)
Now here is that recipe I promised. People who fear baking bread, I implore you to try this! You can and will succeed!
- 3 cups (470g) all-purpose or bread flour
- 1/4 teaspoon instant yeast
- 1.25 teaspoons (10g) salt
- a little milk
- sesame and poppy seeds (optional)
- In a large bowl combine flour, yeast and salt. Add 1 5/8 cups (350g) water, and stir until blended; dough will be shaggy and sticky. Cover the bowl with plastic wrap. Let dough rest at least 12 hours, preferably about 18, at warm room temperature. I’ve left the dough for as much as 36-48 hours and it works just fine!
- The dough is ready when its surface is dotted with bubbles. Lightly flour a work surface (or a big plate or cutting board). Wet your hand and use it to pull the dough out of the bough and onto the work surface. Fold the dough into thirds (as if you were folding a letter), then rotate the dough and fold it into thirds again.
- Lightly grease a bread pan. Place the dough into the pan with the folded seam up. Brush a little milk or water onto the loaf and sprinkle with sesame and poppy seeds. Let the dough rest 60-120 minutes (you don’t HAVE to do this but it can help – definitely don’t let it rest more than 2 hours).
- Preheat the oven to 500 F / 260 C (or as hot as the oven will go). Put the bread in the oven. After 20 minutes, turn the oven down to 400 F / 200 C. Check the loaf and make sure it’s not getting too dark – if it is, cover it with some foil. Bake for another 15 minutes.
- Cool the loaf on a wire rack.


Oh oh – looks like even *I* could make this! Thanks for posting – I was jealous of all the bread your family was devouring over the holidays! Welcome home – I am sure Rocky is glad to have you back!
Mardi, you’re a natural baker! I’m sure you could only improve upon this loaf. 🙂
Ha! Toast fairy! That’s too cute 🙂
That loaf looks incredible–now I just need to find some friends to eat the majority of it for me 🙂