

This Christmas, by far the most unexpected gift I received was a Whirley Pop popcorn maker from my sister, Stephanie. I’m not the biggest fan of popcorn, so at first I was a little confused. But when I opened the little latch of the popcorn maker bowl and found four sacks of green (unroasted) coffee beans from Coffeemaria, things started to come together.
The Whirley-Pop is a stovetop popcorn maker that is also known amongst coffee lovers as a cheap and cheerful option for home roasting coffee beans.
A little background…
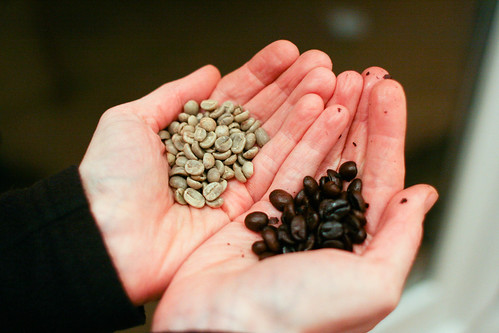
The coffee tree is an evergreen which bears red fruits containing green seeds – these are coffee beans! Roasting turns these beans into the the dark, rich coffee beans that we know and love.
Roasting is a chemical process and so there are many variables to control when roasting coffee beans. Despite all this, roasting coffee in the Whirley Pop is surprisingly easy. We gave it a go last weekend and were hugely impressed by the results.
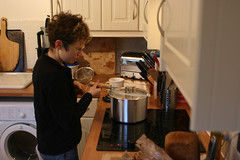
The method was pretty straightforward:
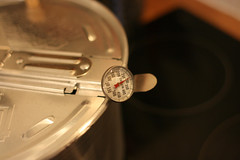
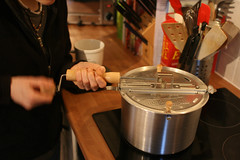
- Put the Whirley Pop on the stove, stick a thermometer in it (that goes up to at least 500 F) and turn it up to high
- Wait until the temperature is as a hot as it can go – mine levelled off at 450 F
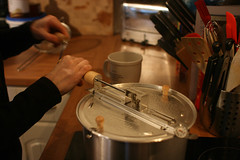
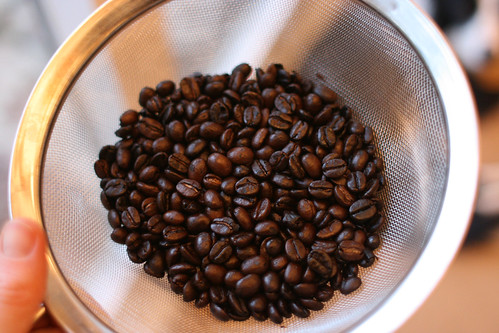
- Add the beans
- Crank continuously for about 6 minutes total (the beans make crack sounds as the roasting takes place, one first round of cracking, then a second more subtle crack – I took them off right after I started hearing the second cracks).
- Cool the beans in a colander (I put them outside to speed up the process)
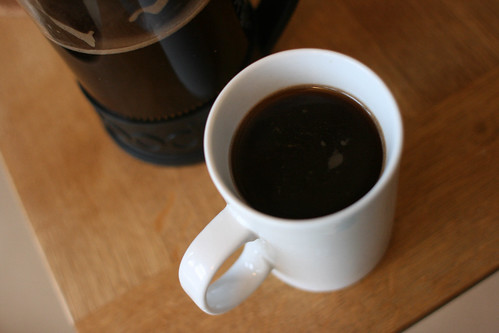
The whole process took about 10 minutes and wasn’t as smokey or messy as I thought it would be. But how did it taste?
First, the smell of the freshly ground roasted beans was incredible. Like no coffee I’ve ever smelled. And the coffee was great! Tim was highly impressed that “such an imprecise method resulted in something so drinkable.” I, too, was pretty blown away by the results.
Many thanks to my sister for such a well thought out gift. I love when I receive presents that are something I’d never think to buy for myself. And this was so incredibly perfect, given how obsessed I am with knowing where my food comes from from start to finish. Stephanie loaded me up with a few varieties of beans, regular and decaf, and I’m looking forward to trying them all.
[UPDATE April 10, 2011]
Have done this quite a few times now and having burnt a couple batches, I thought I’d add some more learnings.
Timing is and isn’t everything…
The amount of beans you roast at a time has an effect on the total roasting time. This seems so obvious now! The method specified above uses about 8oz of beans. I probably wouldn’t roast any more than 10oz at a time. Add more beans, and the roast will take longer. Less beans, shorter time.
This is why it’s important to not really go by the clock, but rather to LISTEN. This whole business of listening to first and second “cracks” doesn’t really describe the situation. It’s a lot like popcorn, really: you heat up the beans, they pop (or “crack”). At first only a few make popping noises, then they all take off.
Here’s my current process: I add the beans, crank for a while until it sounds like lots of beans are popping, and then start checking the beans for readiness. To check, I tip a couple beans out at a time onto a plate as I go. (You have to be quick about it, though, because the Whirley Pop loses heat quickly when you open the lid.)
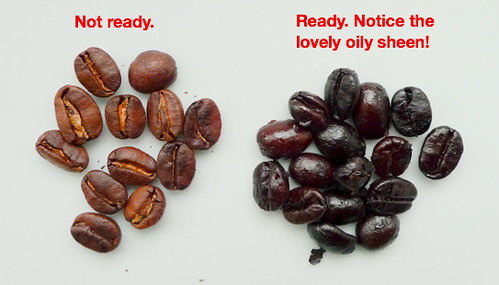
As soon as the beans turn dark brown with a glossy finish, I tip them all into a colander and put them outside to cool.
So has anyone else out there tried doing this? I’m sure others have completely different experiences. I’m working on an electric hob that just doesn’t get that hot. People working over a flame probably have different results / roasting times altogether.
Next time I roast, I promise a video!

Thanks to you sister that is such a thoughtful and cool gift.
Thanks for demonstrating and for the links too.
Unlike you, I do like popcorn and coffee – may have to add this to my 'wish list'.
I recently bought a whirley pop, added a thermometer and have been roasting my own coffee for the past few months. First roast wasn't all that good, but it has improved since then. I have a glass top stove and tried at first using a cast iron skillet under the whirley pop to try keeping the temperature stable, but found it much better roasting without it. I started with a sampler pack from Sweet Marias. Some of the beans turned out wonderful and others we were disappointed with. I think the difference really must be the particular beans we used. In general though we've been really happy.
If the coffe is bitter, what did I do wrong? Not roast long enough? I love this process and am really working for a quality roasting. Also my outd0rr single burner isn't getting over 350 degrees….should I upgrade to a gas burner? Thanks so much, Janet
Rose – that's great to hear. I've had mixed results, too. Part of this I put down to the beans, but the rest is timing. It's too easy to over-roast, IMHO. But this is the fun in practising!
Janet – Per my comment to Rose, I'd think your roasting TOO long? OR you're brewing the coffee too hot? How are you brewing the coffee? As for the temperature… my stovetop gets the Whirley Pop up to 450 max, then it cools straight down to below 300 after adding the beans, then heats back up to about 350-400. Your temp is probably fine?
Another comment. Looking at my not ready / ready pic and I am wondering if I got that right? I bought some coffee beans the other day and they weren't much darker than the beans on the left. What do your beans look like after roasting?
Thank you for your input. I thought roasting them longer would give me the dark beans I want for expresso. I have a 1970's expresso machine that does a wonderful job of making a good cup of coffee. I will try to not roast so long. Blessings and thanks again, Janet